Create an ESP32-Powered Smart Mailbox Notification System with Home Assistant
Create an ESP32-Powered Smart Mailbox Notification System
Ever missed an important piece of mail because you forgot to check your mailbox? I certainly have—more times than I’d like to admit. That’s why I built a smart mailbox notification system using an ESP32 and a simple tilt sensor. Now, I get instant alerts in Home Assistant whenever the mailbox door opens. No more guessing!
In this guide, I’ll walk you through the entire process—from wiring the hardware to configuring ESPHome and setting up automations in Home Assistant. Let’s get started.
What You’ll Need
Before diving in, gather these components:
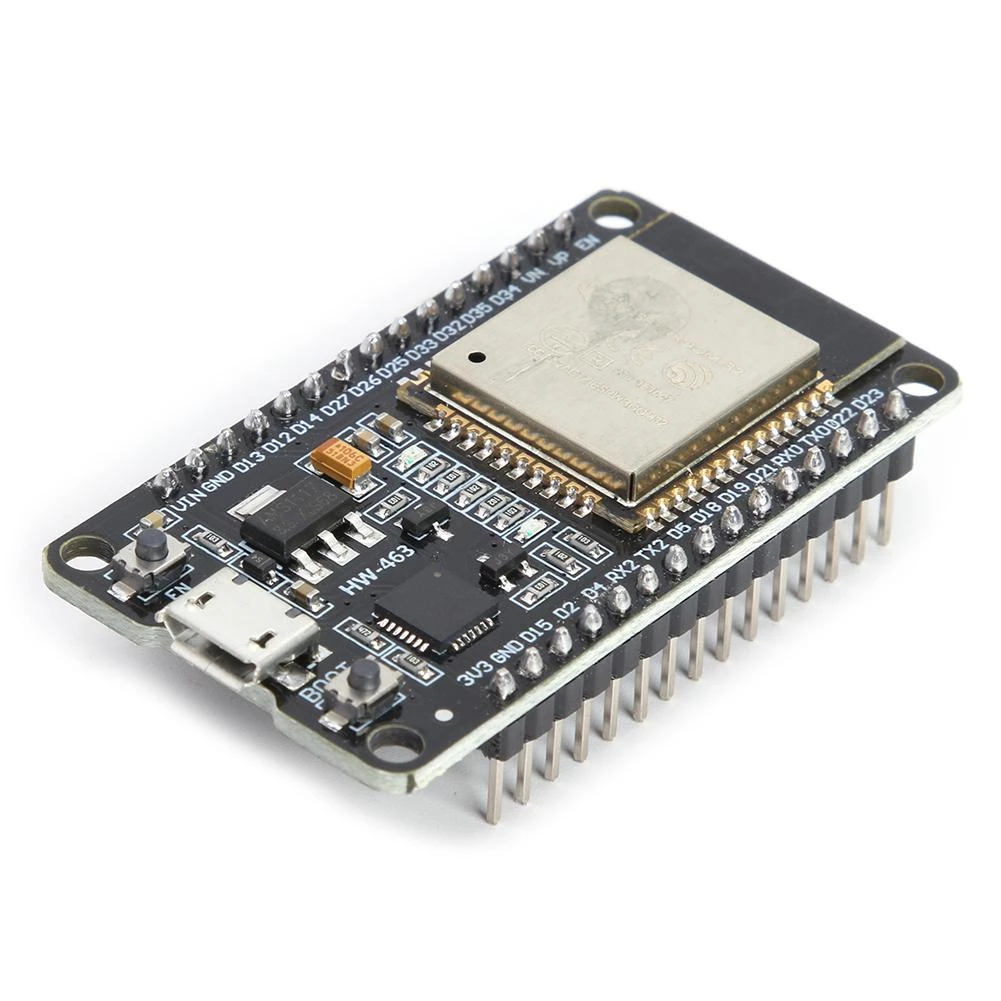
- ESP32-DevKit board: Buy it here
- Tilt sensor (SW-520D): Buy it here
- Breadboard & jumper wires (for prototyping)
- 3.7V LiPo battery: Buy it here (optional, for wireless operation)
- USB cable (for programming)
- Home Assistant instance (already set up)
Step 1: Wiring the Tilt Sensor to the ESP32
The tilt sensor acts as a simple switch—when the mailbox door opens, the sensor tilts and completes the circuit. Here’s how to wire it:
- Connect one leg of the tilt sensor to GPIO 4 (or any free pin).
- Connect the other leg to GND (ground).
- Enable the internal pull-up resistor in software (more on that later).

Step 2: Flashing ESPHome to the ESP32
I prefer ESPHome for its seamless Home Assistant integration. Here’s the configuration:
# mailbox.yaml
esphome:
  name: smart-mailbox
  platform: ESP32
  board: esp32dev

wifi:
  ssid: "YOUR_WIFI_SSID"
  password: "YOUR_WIFI_PASSWORD"

# Enable logging for debugging
logger:

# Enable Home Assistant API
api:

# Tilt sensor as a binary sensor
binary_sensor:
  - platform: gpio
    pin:
      number: 4
      mode: INPUT_PULLUP
    name: "Mailbox Door"
    device_class: opening
    filters:
      - delayed_on: 100ms # Debounce to avoid false triggers
Flash it via USB:
esphome run mailbox.yaml
Stop wasting your time !
Each holiday, you decide to make a smart home project. But each holiday, you spend hours on finding an interesting project to do.
Don't worry, I can help you ! Join my community to receive the newest DIY projects periodically.
Promise! No spam, your email is kept private
Step 3: Adding the Device to Home Assistant
- Open Home Assistant and navigate to Settings > Devices & Services.
- Click Add Integration and select ESPHome.
- Enter the device’s IP or hostname (
smart-mailbox.local).
Once added, you’ll see the Mailbox Door entity under Developer Tools > States.
Step 4: Setting Up Notifications
Now, let’s create an automation to notify you when mail arrives:
# automation.yaml
alias: "Mailbox Opened Alert"
trigger:
  - platform: state
    entity_id: binary_sensor.mailbox_door
    to: "on"
action:
  - service: notify.mobile_app_your_phone
    data:
      title: "📬 Mail Alert!"
      message: "Your mailbox was just opened."
Step 5: Powering the System
For a wireless setup:
- Use a 3.7V LiPo battery with a TP4056 charger module.
- Enable deep sleep in ESPHome to conserve power:
deep_sleep:
  run_duration: 10s
  sleep_duration: 5min
Enhancements & Next Steps
- Weatherproofing: Seal the ESP32 in a waterproof case (example).
- Solar Power: Add a small solar panel for indefinite runtime.
- Multi-user alerts: Use Home Assistant’s group notifications for family members.
FAQ
Q: Can I use an ESP8266 instead of an ESP32?
A: Yes, but ESP32 is preferred for better power management and Bluetooth (if needed).
Q: How do I test the tilt sensor before installing?
A: Tilt it manually and check the logs in ESPHome (logs command).
Q: What if my mailbox is out of Wi-Fi range?
A: Use a Wi-Fi extender or switch to LoRa/ESP-NOW for long-range communication.
For more IoT projects, check out my guides on monitoring home temperature with ESP32 and Zigbee2MQTT setups.
Happy tinkering! 🛠️