ESP32 cam tutorial: Setup a 5$ live streaming camera for your house with esphome
Yes you can monitor your house with live streaming for only 5$.
How? In this article, I will show you my test with esp32 camera. In addition, you will see how to configure it using esphome. Finally, I will show you how to connect esp32 cam to home assistant.
Requirements
Before starting the tutorial, you should have these materials. Aliexpress:
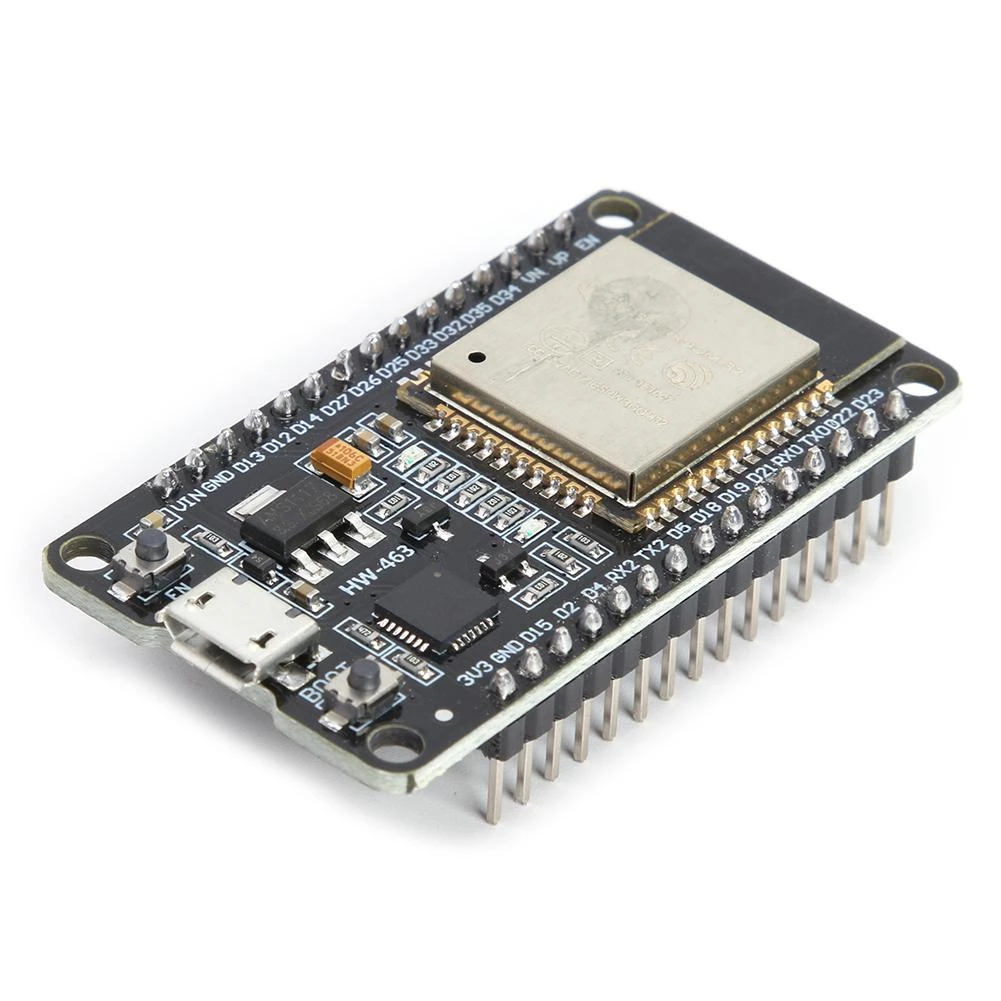
- ESP32-Cam: Buy it here
- Jump wires
- FDTI: Buy it here
If you find any problem during this tutorial: Please leave a commment and I will reply very soon!
Wiring the components
Notice that esp32 cam has multiple pins. You need only 4 pins for flashing the configuration and only 2 pins to feed it with power.
Wire FTDI to esp32 cam as following:
| FTDI | ESP32 cam |
|---|---|
| GND | GND |
| 5V | 5V |
| RX | U0T |
| TX | U0R |
| 100 | GND (essential for flashing) |
ESPhome configuration
If you are not familiar with esphome [check this article](/how-to-monitor-your-home-temperature-with-esp32-and-xiaomi-mijia-using-esphome/.
Run ESPhome on your computer, then prepare the esp32 cam configuration:
- Create a config file
camera.yamlunder config directory. - Add the following configuration to the file.
Stop wasting your time !
Each holiday, you decide to make a smart home project. But each holiday, you spend hours on finding an interesting project to do.
Don't worry, I can help you ! Join my community to receive the newest DIY projects periodically.
Promise! No spam, your email is kept private
substitutions:
  # Modify variables based on your settings
  hostname: "ocamera"

esphome:
  name: $hostname
  platform: ESP32
  board: esp32dev
wifi:
  ssid: wifi_ssid
  password: wifi_password
  fast_connect: True

# Enable logging
logger:

# Enable Home Assistant API
api:
  reboot_timeout: 0s

web_server:
  port: 80

ota:

time:
  - platform: homeassistant
    id: homeassistant_time

# ESP32-CAM
esp32_camera:
  external_clock:
    pin: GPIO0
    frequency: 20MHz
  i2c_pins:
    sda: GPIO26
    scl: GPIO27
  data_pins: [GPIO5, GPIO18, GPIO19, GPIO21, GPIO36, GPIO39, GPIO34, GPIO35]
  vsync_pin: GPIO25
  href_pin: GPIO23
  pixel_clock_pin: GPIO22
  power_down_pin: GPIO32

  name: mycamera

# Flashlight
output:
  - platform: gpio
    pin: GPIO4
    id: gpio_4

## GPIO_4 is the flash light pin
light:
  - platform: binary
    output: gpio_4
    name: $hostname light
Don’t forget to set your wifi and password in the configuration.
Please mind that this configuration is minimalist. You can adjust the configuration to change the quality, the framerate,… All the possible parameters are present on this official doc.
Attention: increasing the quality of the streaming may cause overheating to your esp32 cam.
If you like this tutorial, please give me support by subscribing to my Youtube channel my youtube channel
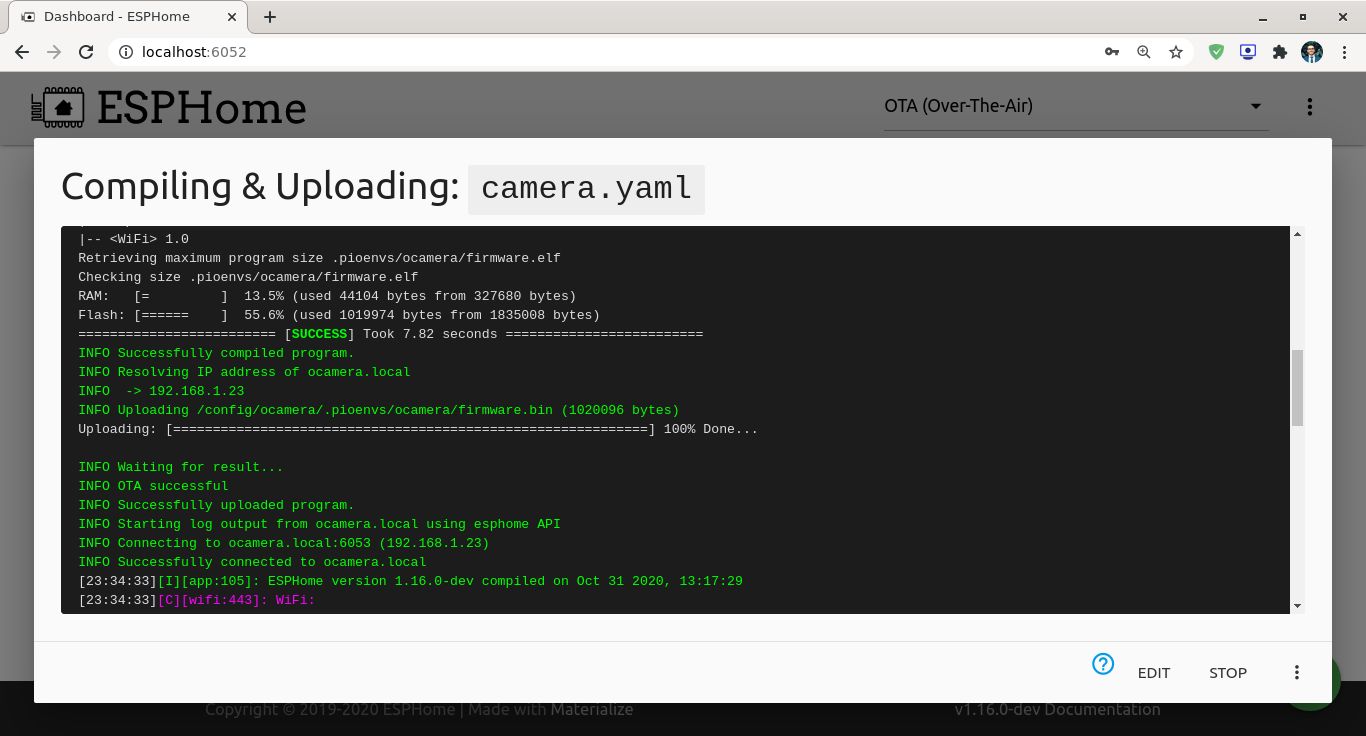
Esphome flash firmware
Now that your configuration is good, go the esphome web pagehttp://localhost:6052. A configuration called camera shoud appear.
- Click on
Validateto be sure that your configuration is good. - Then, choose usb on the top right drop down menu.
- Click upload button to compile and flash esp32 cam with the correct configuration.
- Check that there is no errors in the log.
Live streaming with home assistant
Run home assistant on your computer or raspberry pi (check this article for more information).
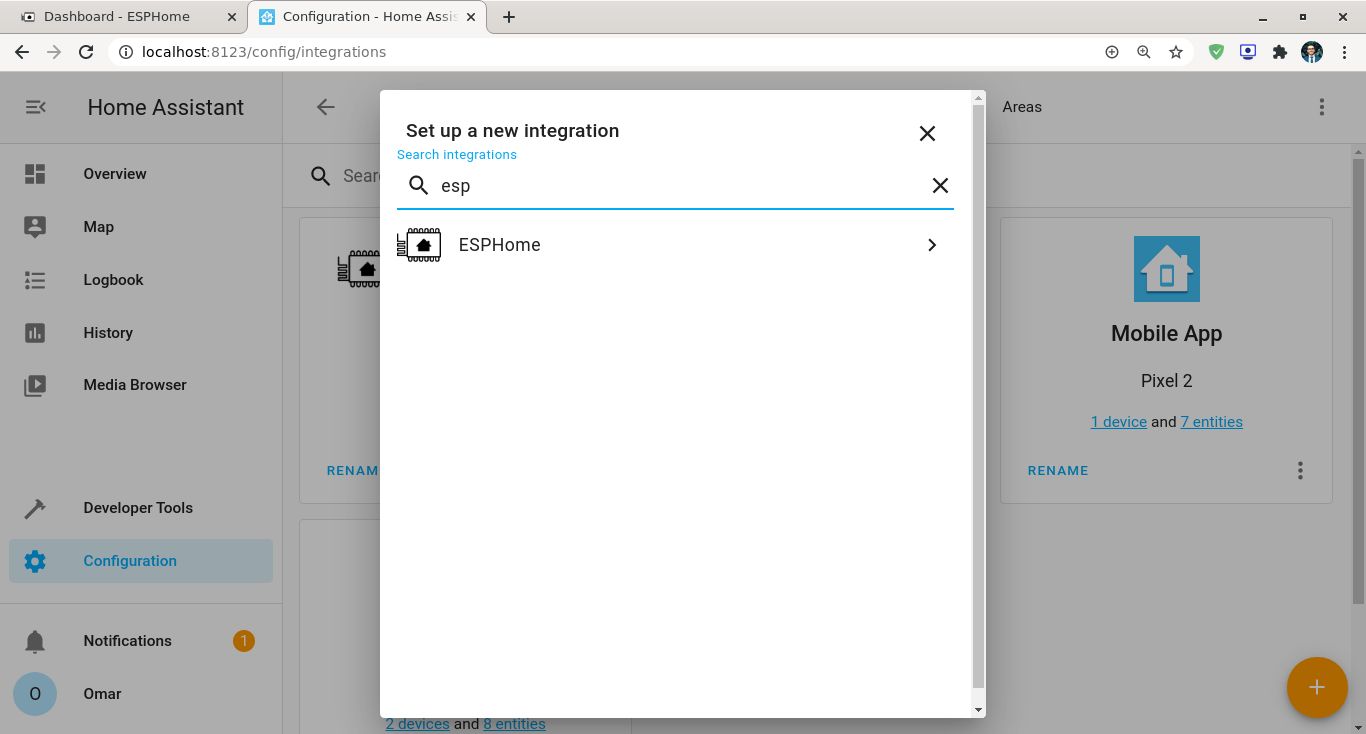
Go to the home assistant webpage http://localhost:8123:
- Click on the left menu: Configuration
- Then click on integrations
- On the bottom right, click on the
+button. - Search for esphome.
- Add your camera ip address then click finish.
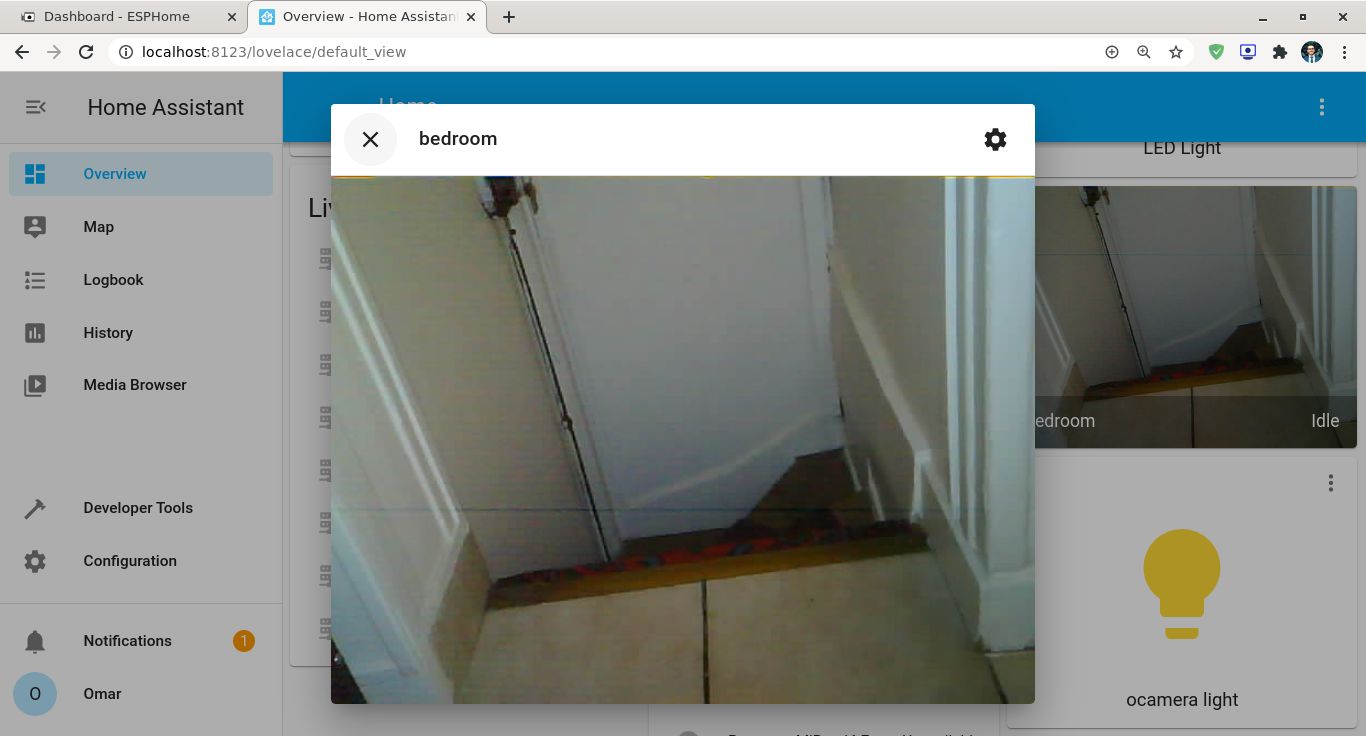
Play live stream
Now you esp32 camera is configured and connected to home assitant:
- Click on the left menu: Configuration
- Then click on Devices
- choose your camera name
- At the bottom of
Entitiescard, click onAdd To Lovelace. - Go to the overview dashboard.

After following these steps, a photo of the camera should appear. If you want to play a live stream, just click on it and enjoy free live stream.