DIY Smart Door Sensor with ESP32 and Home Assistant: A Step-by-Step Guide
DIY Smart Door Sensor with ESP32 and Home Assistant
Ever walked out the door and wondered, Did I close it? I’ve been there too—until I built a DIY smart door sensor using an ESP32 and Home Assistant. Now, my phone buzzes if the door’s left ajar, and I’ve even set up automations to turn off the AC when the door’s open for too long (goodbye, wasted energy!). Here’s how you can build your own.
Why Build a Smart Door Sensor?
Commercial door sensors work great, but they’re often pricey and locked into proprietary ecosystems. With an ESP32 and a magnetic reed switch, you can build a customizable, privacy-friendly alternative that integrates seamlessly with Home Assistant. Plus, it’s a fun weekend project!
Materials You’ll Need
Here’s what I used (with affiliate-free links for transparency):
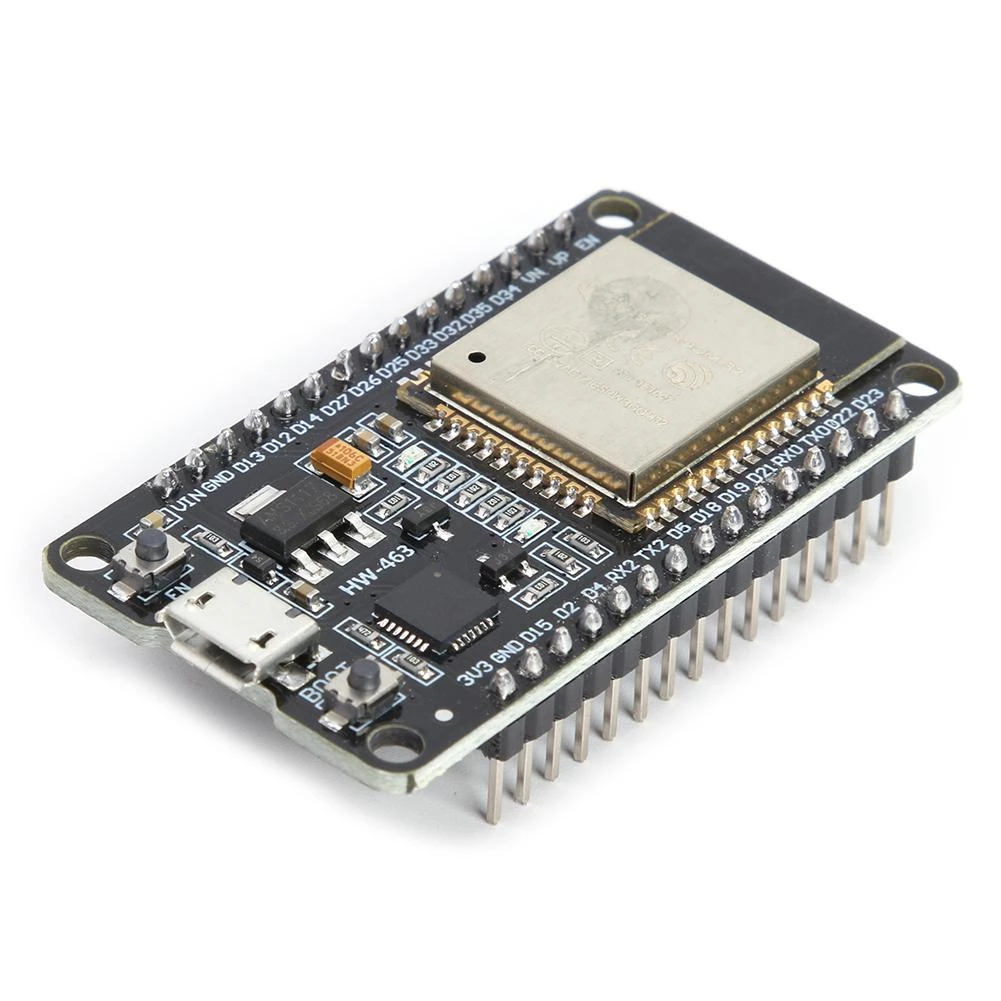
- ESP32-DevKit board: Buy it here
- Magnetic Reed Switch: Buy it here
- Jumper Wires – For connections.
- Breadboard (optional) – Helps with prototyping.
- Micro-USB Cable – To power the ESP32.
- Home Assistant Instance – Already set up (check my guide if you need help).
Step 1: Wiring the Reed Switch to the ESP32
The reed switch is a simple device: it closes (completes the circuit) when near a magnet and opens when the magnet moves away. Here’s how to wire it:
- Connect one end of the reed switch to GPIO 4 on the ESP32 (you can use any GPIO, but avoid pins 6-11 if using SPI).
- Connect the other end to the 3.3V pin on the ESP32.
- Add a 10kΩ pull-down resistor between GPIO 4 and GND to prevent floating signals.
Here’s a quick diagram:
ESP32 GPIO 4 → Reed Switch → 3.3V
                |
            10kΩ Resistor
                |
               GND
Stop wasting your time !
Each holiday, you decide to make a smart home project. But each holiday, you spend hours on finding an interesting project to do.
Don't worry, I can help you ! Join my community to receive the newest DIY projects periodically.
Promise! No spam, your email is kept private
Step 2: Flashing the ESP32 with ESPHome
ESPHome makes it dead simple to program the ESP32 for Home Assistant. Here’s the configuration:
- Install ESPHome via Home Assistant’s add-on store or Docker.
- Create a new device (
smart_door_sensor.yaml) and paste this code:
esphome:
  name: smart-door-sensor
  platform: ESP32
  board: esp32dev

wifi:
  ssid: "YOUR_WIFI_SSID"
  password: "YOUR_WIFI_PASSWORD"

# Enable logging for debugging
logger:

# Enable Home Assistant API
api:
  password: "YOUR_API_PASSWORD"

# Reed switch sensor
binary_sensor:
  - platform: gpio
    pin: GPIO4
    name: "Front Door Sensor"
    device_class: door
- Flash the ESP32 by running:
esphome run smart_door_sensor.yaml
Step 3: Integrating with Home Assistant
Once flashed, the sensor should auto-appear in Home Assistant under Settings > Devices & Services. Now, let’s set up a notification:
- Go to Settings > Automations & Scenes.
- Create a new automation with this trigger:
trigger:
  - platform: state
    entity_id: binary_sensor.front_door_sensor
    to: "on" # Door is open
- Add an action to notify your phone (replace with your notification service):
action:
  - service: notify.mobile_app_your_phone
    data:
      message: "Front door is open!"
Step 4: Advanced Automations
Here’s where it gets fun. Try these ideas:
- Energy Saver: Turn off HVAC when the door’s open for 5+ minutes.
- Security Alert: Flash lights if the door opens at night.
- Pet Monitor: Get a notification if the dog door is left open.
Example automation to turn off AC:
alias: "Turn off AC when door is open"
trigger:
  - platform: state
    entity_id: binary_sensor.front_door_sensor
    to: "on"
    for:
      minutes: 5
action:
  - service: climate.turn_off
    target:
      entity_id: climate.living_room_ac
Troubleshooting Common Issues
- Sensor Not Updating: Check WiFi signal strength near the door.
- False Triggers: Ensure the magnet is aligned properly with the reed switch.
- ESP32 Not Booting: Verify wiring and ensure no shorts.
FAQ
Can I use an ESP8266 instead of an ESP32?
Yes! The wiring and ESPHome config are nearly identical.
How do I power this battery?
For battery use, swap to an ESP32 with deep sleep support and a LiPo battery. Here’s a great guide.
Can I monitor multiple doors?
Absolutely! Just add more reed switches and configure them in ESPHome.
Next Steps
- Add a reed switch to windows for full home monitoring.
- Integrate with Grafana for historical data (like my temp monitoring project).
- Build a dashboard to visualize door states.
Now go forth and never second-guess your door’s status again! 🚪💡
Building something like this in production?
I help teams turn setups like this into reliable, monitored infrastructure.
Get a free consulting callGet my monitoring stack checklist
The exact checklist I use when setting up observability for a new team. No spam, unsubscribe anytime.